
This fast tutorial has been apply for all of my websites and my current site wpspeedinsight.com. You can apply it under ServerPilot or under Ubuntu 16.04 environment.
Recently I have been using ServerPilot to configure all software stuff to run my WordPress Blog, ServerPilot is fast, easy to use, and I believe they have good configuration according to WordPress Self Hosting, the combination of software are:
Nginx in front of Apache. PHP-FPM and MySQL
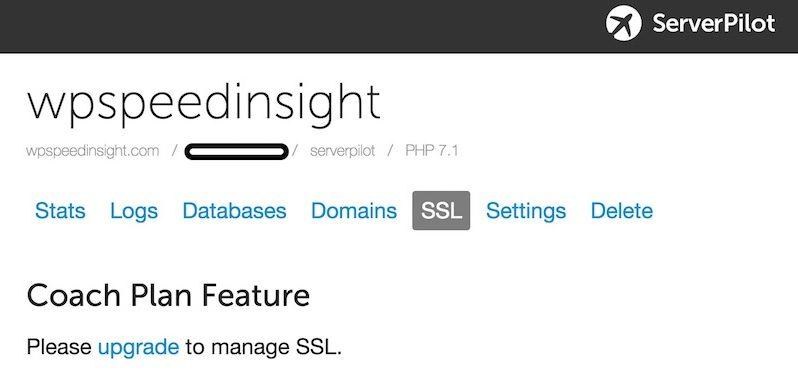
This setup & configuration proved to be a good combination for WordPress, however, you run into little problem with setting up free SSL for your site. In order to have SSL on ServerPilot, you need to opt-in for Coach Plan $10 / month / server. That’s seem to be too much just for the SSL and monitor services. So I decided to install Let’s Encrypt SSL manually. The job is easy, please follow this guide:
Here is the full steps:
- Setup ServerPilot and install WordPress
- Install Certbot ( to deploying Let’s Encrypt certificates )
- Generate Cert for domain
- Edit Nginx Configuration file for domain
- Reload Nginx & Have your site SSL running
- Automatic Renew SSL
Setup ServerPilot and install WordPress
Please follow the ServerPilot guide to connect to your server, you will need fresh install of Ubuntu 16.04. Then install WordPress for your domain.
I assume this steps will be easy so I will skip it. Please check ServerPilot documents if you run into any problem.
Install Certbot ( to deploying Let’s Encrypt certificates )
Certbot is easy to use way you can install Let’s Encrypt without understanding or involve much of Certificate process. You can install certbot by:
$ sudo apt-get update
$ sudo apt-get install software-properties-common
$ sudo add-apt-repository ppa:certbot/certbot
$ sudo apt-get update
$ sudo apt-get install python-certbot-nginx
Certbot is ready to use.
Generate Cert for domain
We will use standard alone method, no need to automatic use nginx extension, first stop nginx:
$sudo service nginx-sp stop
$sudo certbot certonly

Saving debug log to /var/log/letsencrypt/letsencrypt.log

How would you like to authenticate with the ACME CA?
-------------------------------------------------------------------------------
1: Spin up a temporary webserver (standalone)
2: Place files in webroot directory (webroot)
-------------------------------------------------------------------------------
Select the appropriate number [1-2] then [enter] (press 'c' to cancel):
Select 1 for “standalone” method.
Please enter in your domain name(s) (comma and/or space separated) (Enter 'c'
to cancel):
Enter your domain and you are done. You should see the success message:
IMPORTANT NOTES:
 - Congratulations! Your certificate and chain have been saved at
 /etc/letsencrypt/live/yourdomain.com/fullchain.pem. Your cert will
 expire on 2017-10-23. To obtain a new or tweaked version of this
 certificate in the future, simply run certbot again with the
 "certonly" option. To non-interactively renew *all* of your
 certificates, run "certbot renew"
Well done! So now you only need to tell Nginx to use SSL for your domain and point to the certificate locaation at: /etc/letsencrypt/live/yourdomain.com
Edit Nginx Configuration file for domain
Go to your domain config location:
cd /etc/nginx-sp/vhosts.d/
Your should see your domain config file as: yourdomain.conf
Edit the file and make some changes as following:
server {
listen 443 ssl;
listen [::]:443 ssl;
server_name
wpspeedinsight.com
;

ssl on;

ssl_certificate /etc/letsencrypt/live/wpspeedinsight.com/fullchain.pem;
ssl_certificate_key /etc/letsencrypt/live/wpspeedinsight.com/privkey.pem;

root /srv/users/serverpilot/apps/wpspeedinsight/public;

access_log /srv/users/serverpilot/log/wpspeedinsight.com/wpspeedinsight.com_nginx.access.log main;
error_log /srv/users/serverpilot/log/wpspeedinsight.com/wpspeedinsight.com_nginx.error.log;

proxy_set_header Host $host;
proxy_set_header X-Real-IP $remote_addr;
proxy_set_header X-Forwarded-For $proxy_add_x_forwarded_for;
proxy_set_header X-Forwarded-SSL on;
proxy_set_header X-Forwarded-Proto $scheme;

include /etc/nginx-sp/vhosts.d/wpspeedinsight.d/*.nonssl_conf;
 include /etc/nginx-sp/vhosts.d/wpspeedinsight.d/*.conf;
}
Reload Nginx & Have your site SSL running
Reload Nginx and if there is no issues, your site should be running under SSL now:
service nginx-sp restart
Automatic Renew SSL
$ sudo certbot renew --dry-run
If that appears to be working correctly, you can arrange for automatic renewal by adding a cron or systemd job which runs the following:
$sudo certbot renew
—————
Quite easy isn’t it. Your site should be running under SSL in less than 5 minutes, if you run into any trouble, please comment below and I will help.


Leave A Comment